Image

A Cut Above
It’s one of my favorite times of the year – time to start propagating, or creating more, plants for the Fall Plant Sale on September 21st! We have begun identifying what plants in our Brookgreen collection we want to propagate for the sale and have started snagging cuttings. Even though it may feel early, this is the time the plants are actively growing and sending out lots of tender new growth, allowing us an opportunity to take prime cuttings. This also gives us time to get them rooted and to a good size for sale.

Before we run out the door with reckless abandon, our heads filled with images of sweet new plants just waiting to be created…! We need to gather a few essential items first. So, as my friends would say in high school “Pump ya brakes!” These are cuttings after all, so a pair of pruning shears is in order. We need to keep these cuttings fresh until we get back to process them. That means bringing out some water and paper towels. Lest we forget, we need a way to keep all of these cuttings straight. Re-sealable bags and a pen or sharpie will do the trick. Once you have your checklist assembled, it’s time to the hit the road.
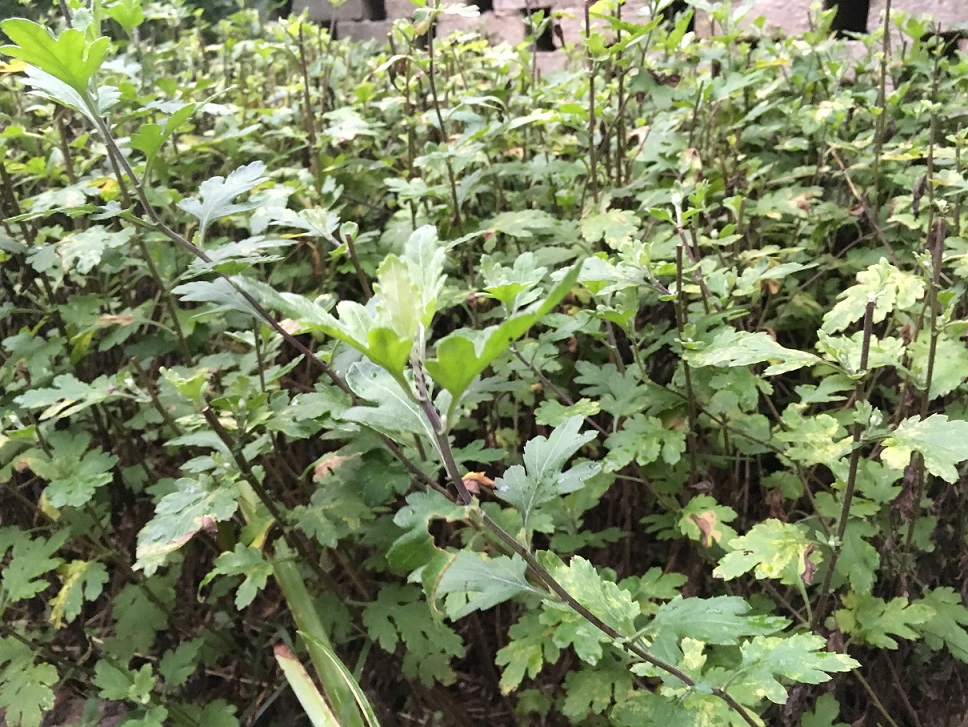
One of the plants we identified for propagation is Chrystanthemum ‘Mrs. Robinson,’ a fall flowering perennial with small, but numerous, red flowers. This planting in the Upper Right Wing was where we collected our cuttings.
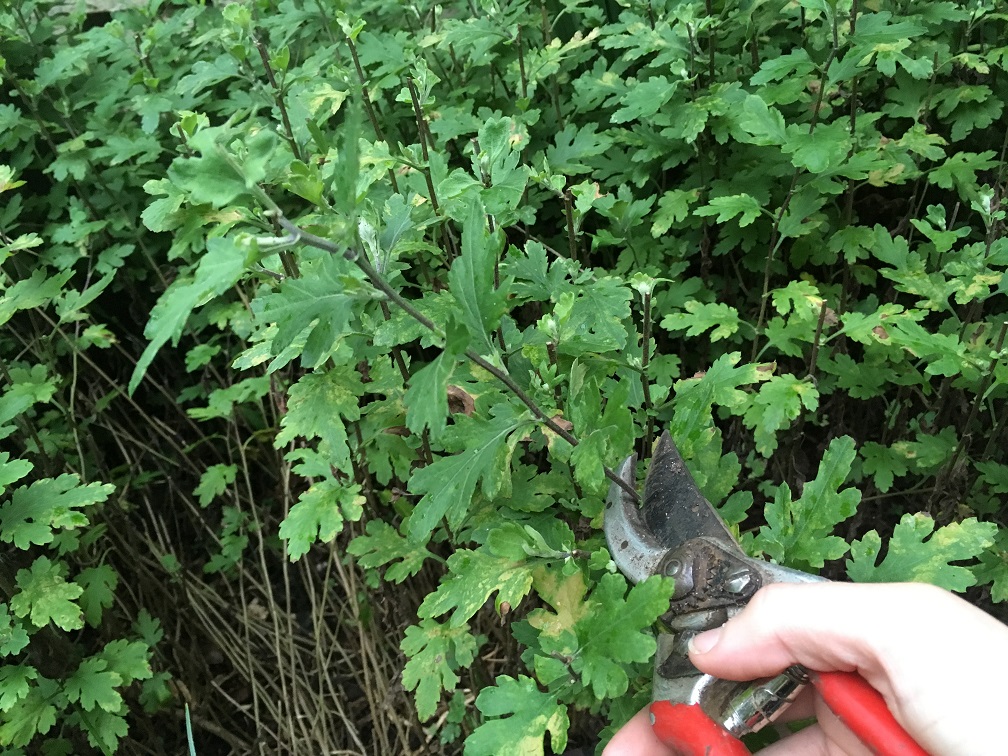
I like to take cuttings that are about six inches long. This gives me some room to play with when I go back to process them. I make my cuts just above where the next bud on the stem is. This leaves the plant ready to send out new growth from the buds just beneath. This keeps the overall plant well pruned and in good health, encouraging branching from the bud we cut to. As for our cutting, we will refine it once we are ready to process it back at the greenhouse.
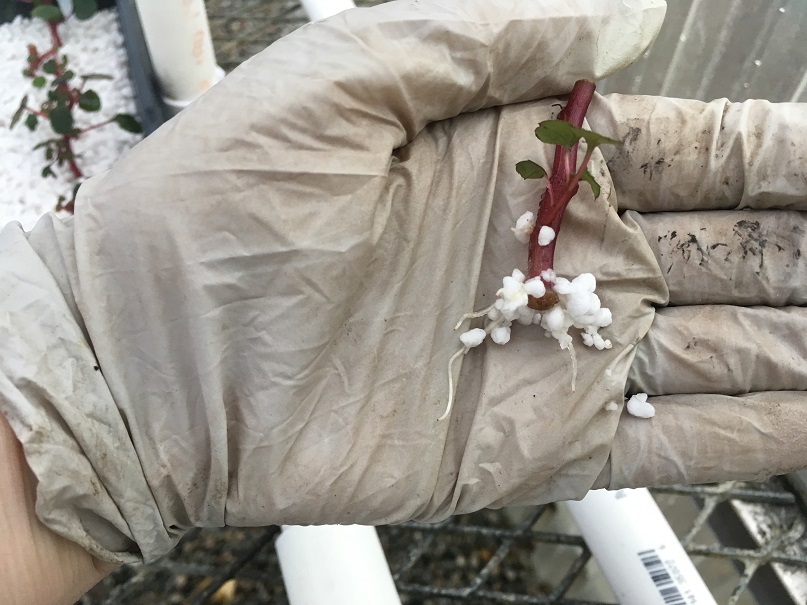
To keep our cuttings fresh, we wet a paper towel and wrap it around the cut part of the stem. It’s kind of like when you get flowers. You put the cut stems in water to keep them nicer longer. While we will process these faster than you will (hopefully) keep cut flowers at home, we still want optimum cuttings at our disposal. I know what you’re thinking – let’s address the elephant in the room. The imposter pictured above is not a chrysanthemum! Since we are out there collecting all sorts of cuttings, that leads us to our next point…
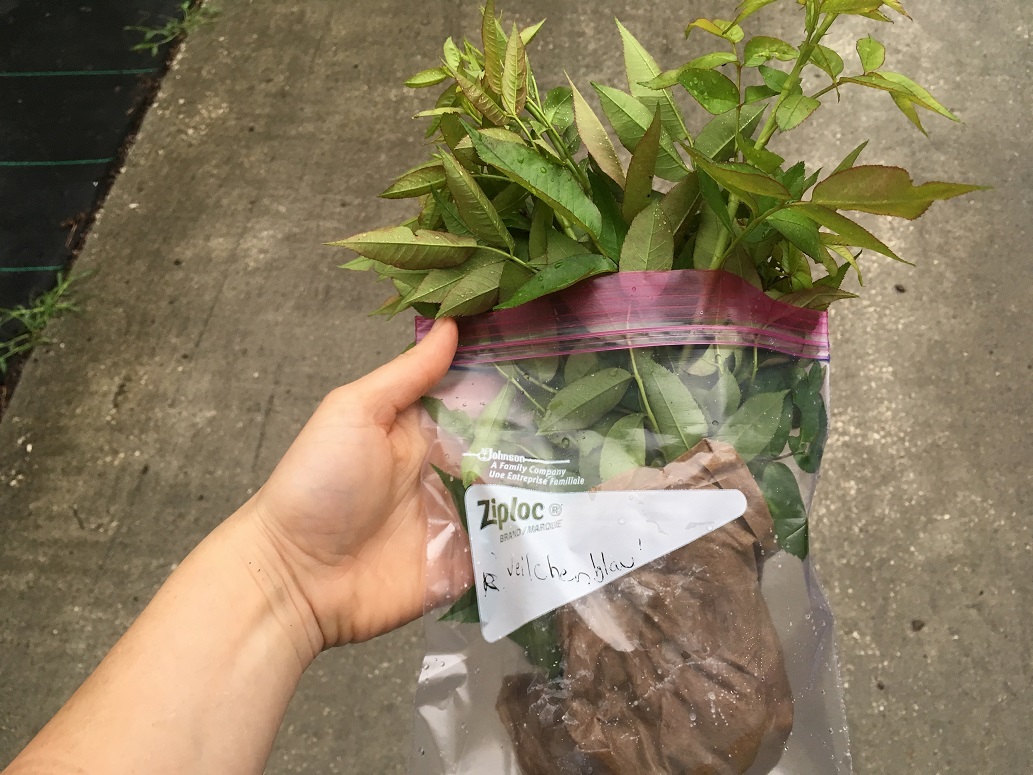
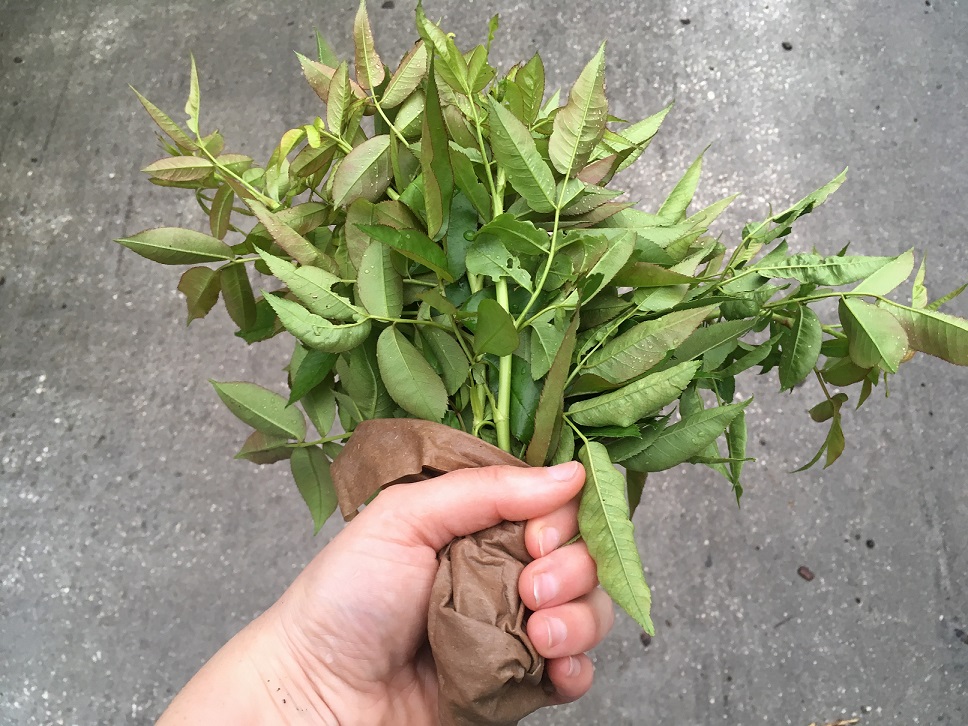
Bringing out re-sealabe bags is great for two reasons. First, you can keep your cuttings and their wet paper towel wet longer (and, you guessed it – fresh!). Second, you have times when you’re grabbing a bunch of cuttings from different plants and simply need to keep track. We brought a pen for a reason! While it may be hard to read, these cuttings belong to a rose we also collected cuttings from.
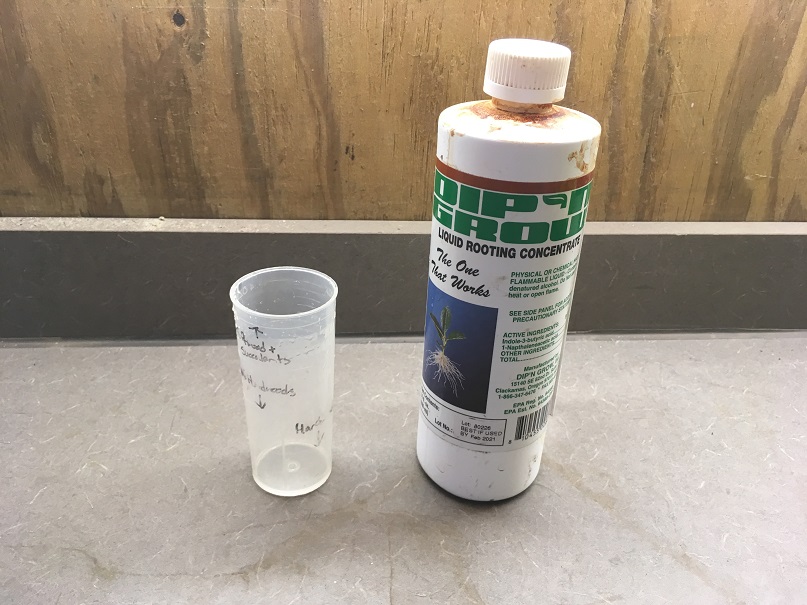
Once all of our cuttings were collected. It was time to prepare to process them. This meant getting out our rooting hormone and mixing it together. We also prepared our tray of perlite where we would place our cuttings until they rooted. I prefer perlite as a medium for rooting cuttings as it drains well and does not seem to be favored by fungus gnats.
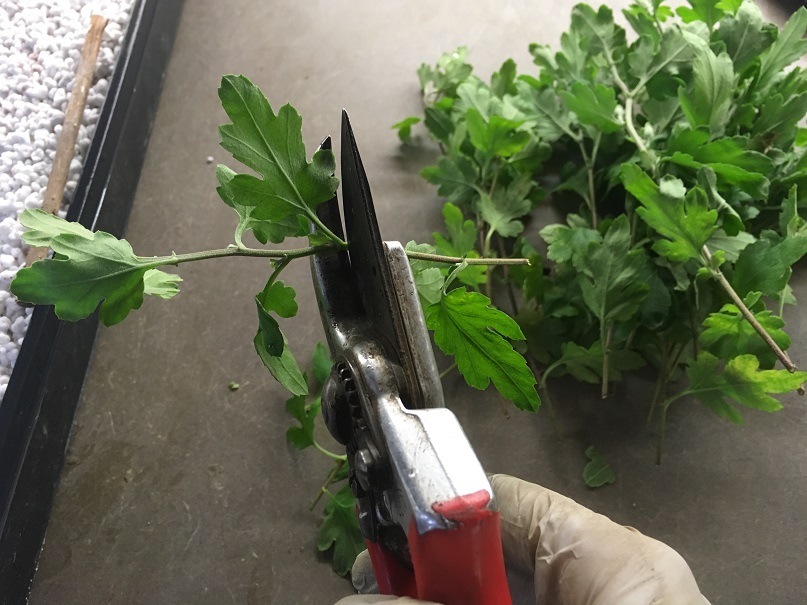
With our hormone and tray ready to go, we began processing the cuttings. To start, we shortened our cuttings to about three to four inches and cut right below a bud (located just above a leaf).
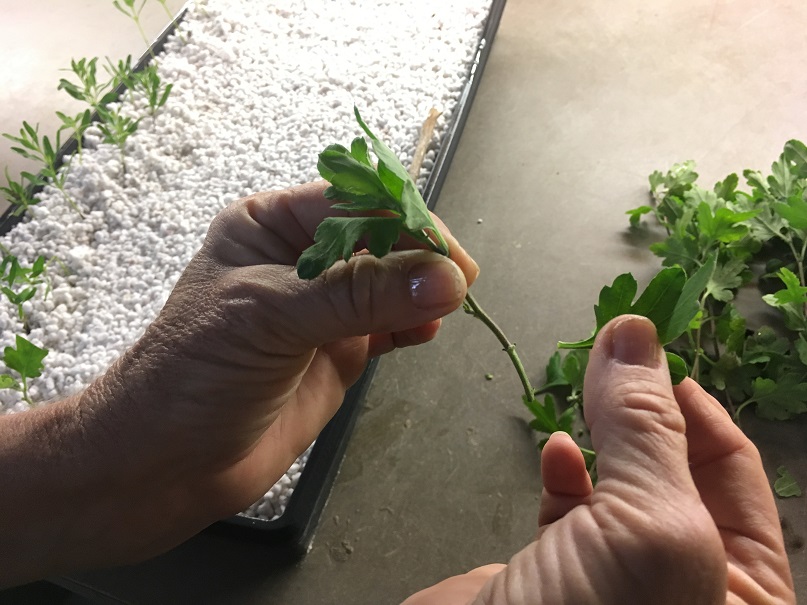
Then, we removed most of the lower leaves, certain to make sure none would be buried in the perlite. A few of the top leaves remained. Since the cutting does not have roots, it has no way of taking up water. The leaves transpire, or release water, thus causing the cutting to lose water. For this reason, we remove most of the leaves to reduce the loss of water.
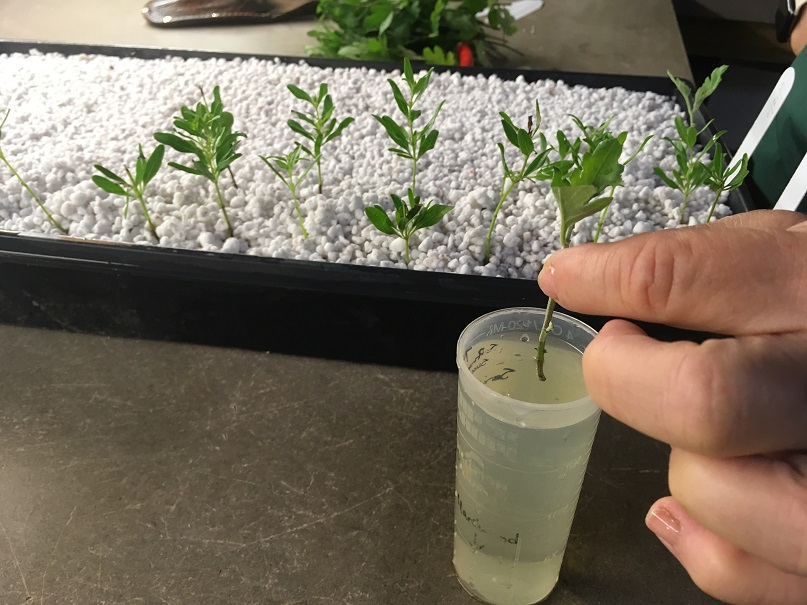
Once the cutting has been processed, it’s time to dip it in the hormone. The mix we use requires we hold the bottom of the cutting (the part without leaves) in the mix for three to five seconds. After dipping, we gently shake off any excess liquid.
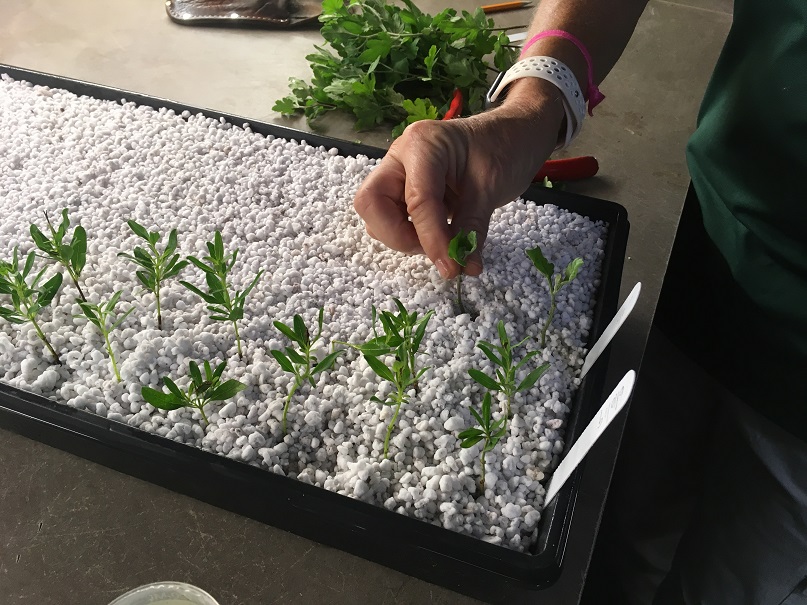
Using a pencil, we create a hole in the perlite. Like digging a hole for a new plant (but much less labor intensive), we stick the dipped cutting into the opening in the perlite. If only all planting could be so simple!
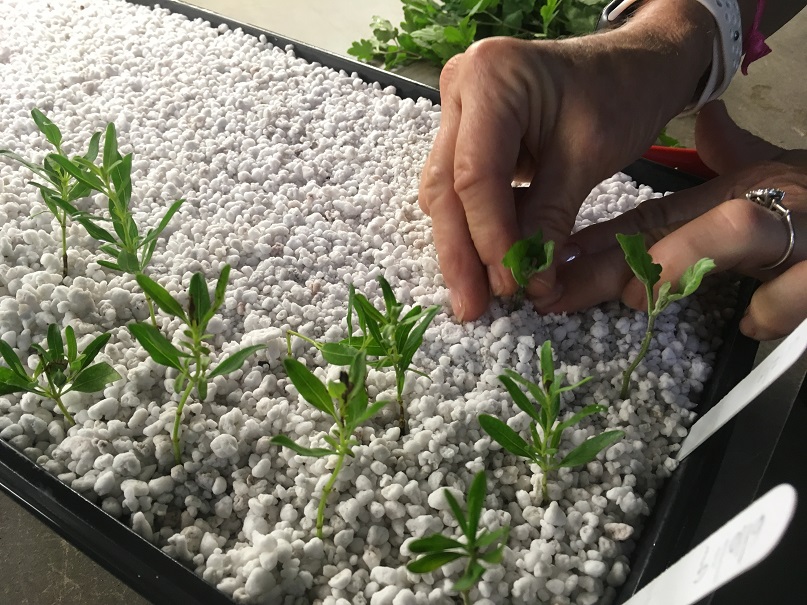
Gently, we push the perlite around the base of the cutting. The cutting should be stable and stand erect.
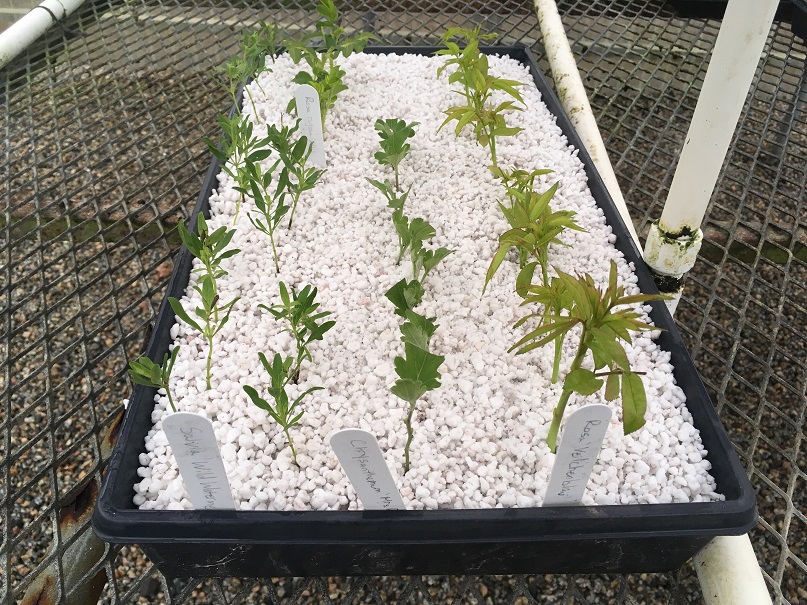
After we have completed all of our cuttings, it’s time to put them on the mist table!
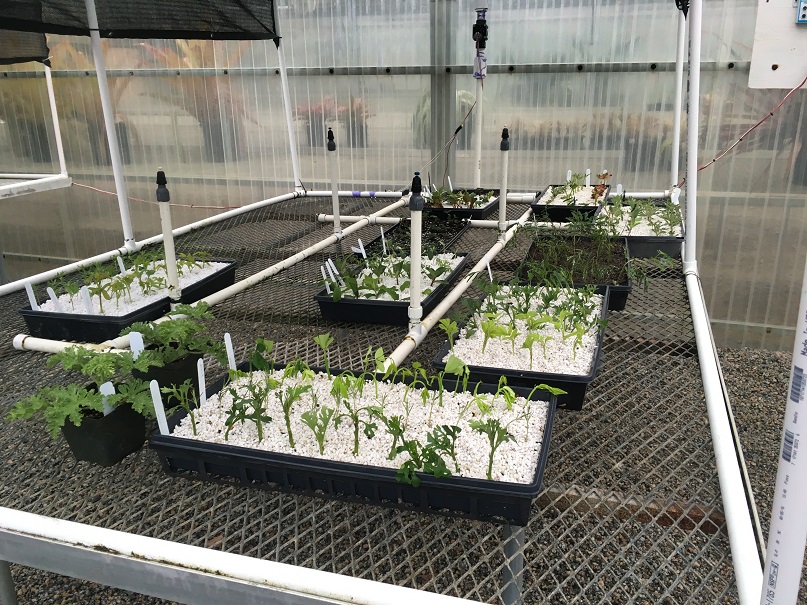
All of our cuttings spend their time on the mist table until their roots have formed. Our mist tables run on a timer, helping us to keep our cuttings in good health until it’s time to get them in pots. By misting the cuttings, it helps to keep them from drying out.
With periodic checking, we see when our cuttings have started to develop roots. The time for root production varies between different plants. Once the roots have developed enough, the cutting is placed in a four inch pot and planted with potting media where it can continue to grow its roots more fully.
From here, it’s just a waiting game until all of our baby plants are ready to graduate to their pots. Plant sale will be here before we know it, and these little plants will be excited to come home with you! Don’t forget to mark you calendars, Fall Plant Sale is September 21st and we can’t wait to see you there!
See you in the gardens!
Hours: Monday & Tuesday 9:30 AM - 5:00 PM
Wednesday - Sunday 4:00 PM - 9:00 PM
For daytime admission, gates close at 4:30 PM. For their safety and the safety of our animal collection, pets are not allowed, nor can they be left in vehicles inside Brookgreen. Service animals that have received special training to assist disabled persons are welcome.
Daily General Admission Tickets for 7 consecutive days
Children 3 and under: Free
Children 4-12: $14
Adults 13-64: $25
Seniors 65 & Over: $23
1931 Brookgreen Drive
Murrells Inlet, SC 29576
Off US Highway 17 Bypass, between Murrells Inlet and Pawleys Island on South Carolina's Hammock Coast
843-235-6000
GOOGLE DIRECTIONS